What is GraphQL?
GraphQL is a query language for APIs developed internally by Facebook (now Meta) in 2012 before being publicly released in 2015. GraphQL provides a complete and understandable description of the data in your API, resulting in a readable and self-documenting query language.
Compared to the REST API architecture, instead of having GET requests, GraphQL uses Queries, while Mutations handle the rest of the HTTP methods like POST, DELETE, etc. Subscriptions are used as listeners but only recommended if you expect frequent smaller changes since they maintain an active connection to the server.
Why use GraphQL?
As with all technology, RESTful APIs come with their own set of problems. GraphQL is here to solve them—namely, under-fetching, over-fetching, and frequent changes on the frontend.
Under-fetching is when a response does not give us all the information we’re looking for, and to obtain all the crucial information, multiple requests to the server must be made. Over-fetching is the opposite when the response gives too much information, which may be useless in the context of implementation.
A commonly used development pattern with REST APIs is to structure the endpoints according to an application’s views. This is handy because it allows for receiving all required information for a particular view by simply accessing the corresponding endpoint. The most prominent drawback of this approach is that it doesn’t allow for frequent product changes on the frontend. With every change made to the UI, there’s a high risk that more (or less) data is required than before. This kills productivity and slows down the ability to incorporate user feedback into a given product.
These issues are solved by both the flexible nature of GraphQL, which in turn makes it so that the changes on the client side can be made without any extra work on the server, and the specificity, which provides exact information to the application without the need of extra fuss.
Single source of truth
With GraphQL, you model your business domain as a graph by defining a schema, and within your schema, you define different types of nodes along with their connections and relations. The business logic layer, therefore, acts as your single source of truth.
Strong typing
GraphQL is a strongly typed language, meaning that data types (integers, strings, etc.) must be predefined at compile time. This results in having no runtime errors, accelerated development, and more optimized code. It may be rigorous at first, but it makes finding and avoiding bugs much easier in the long run.
API project setup
Let’s create a project centered around books to give this blog a purpose. Assuming you have Rails installed (this project uses Rails 7), the next step is creating a new API project. In this case, we’ll name it graphql-with-rails.
To create it, simply run:
rails new graphql-with-rails --api
Navigate into the project with cd graphql-with-rails, and create some models using the following commands:
rails g model Author name:string date_of_birth:datetime place_of_birth:string
rails g model Book title:string pages:integer rating:float year_published:integer description:text
Open the models and add associations:
Create a migration based on the associations (note: this will link books to authors):
rails g migration AddAuthorRefToBooks author:references
Finally, update the schema with rails db:migrate.
GraphQL setup
We'll add a couple of gems related to GraphQL. Open the Gemfile and add gem ‘graphql', which we’ll use for GraphQL. Next, add gem ‘graphiql-rails' under the development group, which we’ll use for its graphic interface, which helps test the code. Also, we’ll use the Sprockets gem which compiles and serves web assets to the GraphiQL IDE.
Let’s also add a gem for seeding our database. For that, we also use the faker gem - add gem 'faker' to your Gemfile. Now we’ll need to run bundle install to use these gems. After the successful installation, run rails generate graphql:install, which will create a new directory app/graphql/.
Creating objects
Let’s create objects that match our models:
rails generate graphql:object book
rails generate graphql:object author
If you look at the two newly created files, app/graphql/types/book_type.rb and app/graphql/types/author_type.rb, this is what they should look like:
Each field is an attribute of the model, and we are defining the type for each one. We can easily add a new field for the Book type and define a method for that field:
The object refers to the model, in this case it’s the Book model. The description helps with self-documentation which shows up in the docs of queries that use that field. One great thing about writing documentation this way is that it changes with the queries and is always in sync with them. That’s a big part of GraphQL.
Creating queries
We can make two types of requests; a query type and a mutation type.
Open the app/graphql/types/query_type.rb file to create a new query. Don’t hesitate to remove the auto-generated code. We’ll add a query to get an author by their id.
To seed the database using the previously added faker gem, require it in the db/seeds.rb file. Create some seeds with the following:
Run rails db:seed to seed the database.
Adjust the config/routes.rb to use the graphiql-rails gem within the development environment:
Require the sprockets gem in config/application.rb with:
require "sprockets/railtie"
This will enable serving web assets to the GraphiQL interface.
To enable session management configured in your initializers, set the config.api_only to false in the file mentioned above.
Finally, create a new file: app/assets/config/manifest.js. Sprockets use this file to specify which files will be used as a top-level target. Since we’re using Sprockets prior to 4.0, Rails will compile both the application.css and the application.js. This is how the manifest.js file should look like:
Run the server with rails s and go to localhost:3000/graphiql.
Once you’re there, you can play and test queries. A simple one would look like the following:
query AuthorName($id: ID!) {
author(id: $id) {
name
}
}
The query name is completely arbitrary and can be omitted while the query variables need to be in JSON. For this one, we just need an id:
{
"id": 1
}
The query should retrieve the Author's name matching the given id:
{
"data": {
"author": {
"name": "Nicky O'Hara"
}
}
}

Creating mutations
GraphQL mutations are special fields that, instead of reading data, create, update, or destroy objects and modify data. We call these modifications side effects. Mutations accept inputs called arguments and return values via fields.
To make a new mutation, create a file app/graphql/mutations/create_book.rb, we can say that the mutation can receive the title, number of pages and the year published (optional):
Add the field to the mutation_type.rb file:
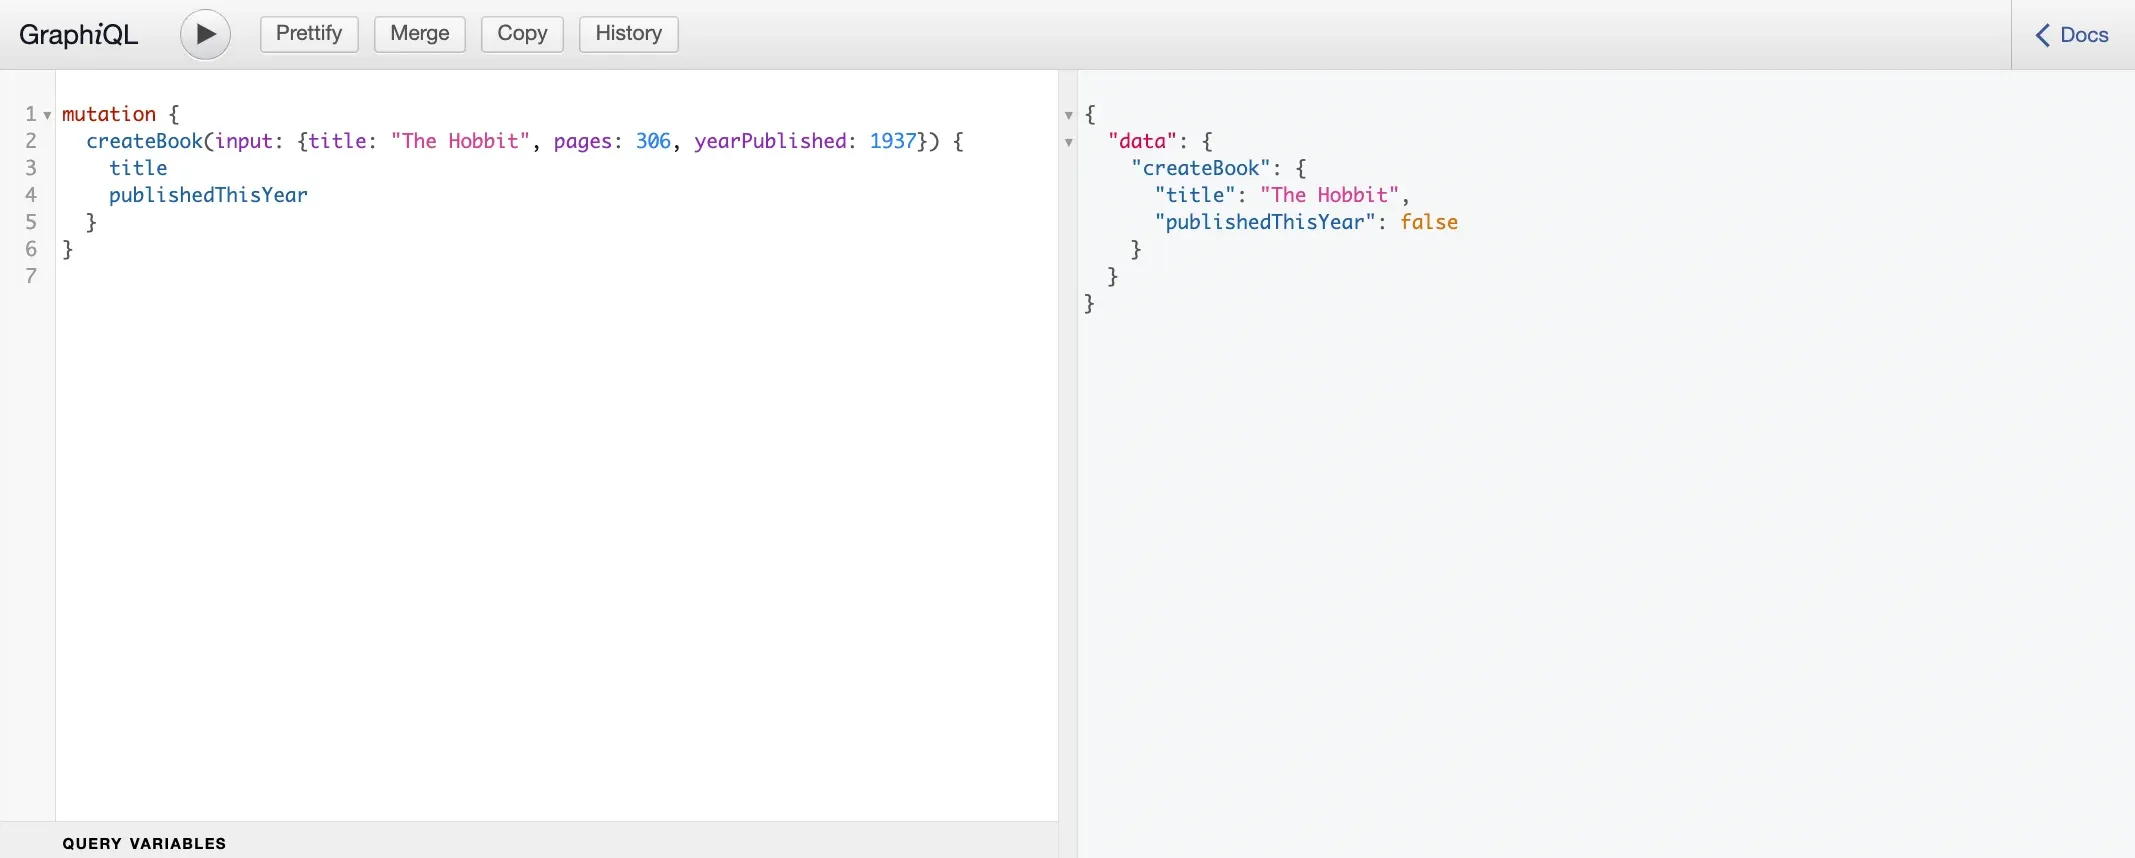
Now when we run this mutation in the GraphiQL web interface:
mutation {
createBook(input: {title: "The Hobbit", pages: 306, yearPublished: 1937}) {
title
publishedThisYear
}
}
We should get the resulting new book:
{
"data": {
"createBook": {
"title": "The Hobbit",
"publishedThisYear": false
}
}
}
The name of the mutation is just the name of the field in the mutation_type.rb but in the camel case. The title and page fields are required as defined in the CreateBook mutation.

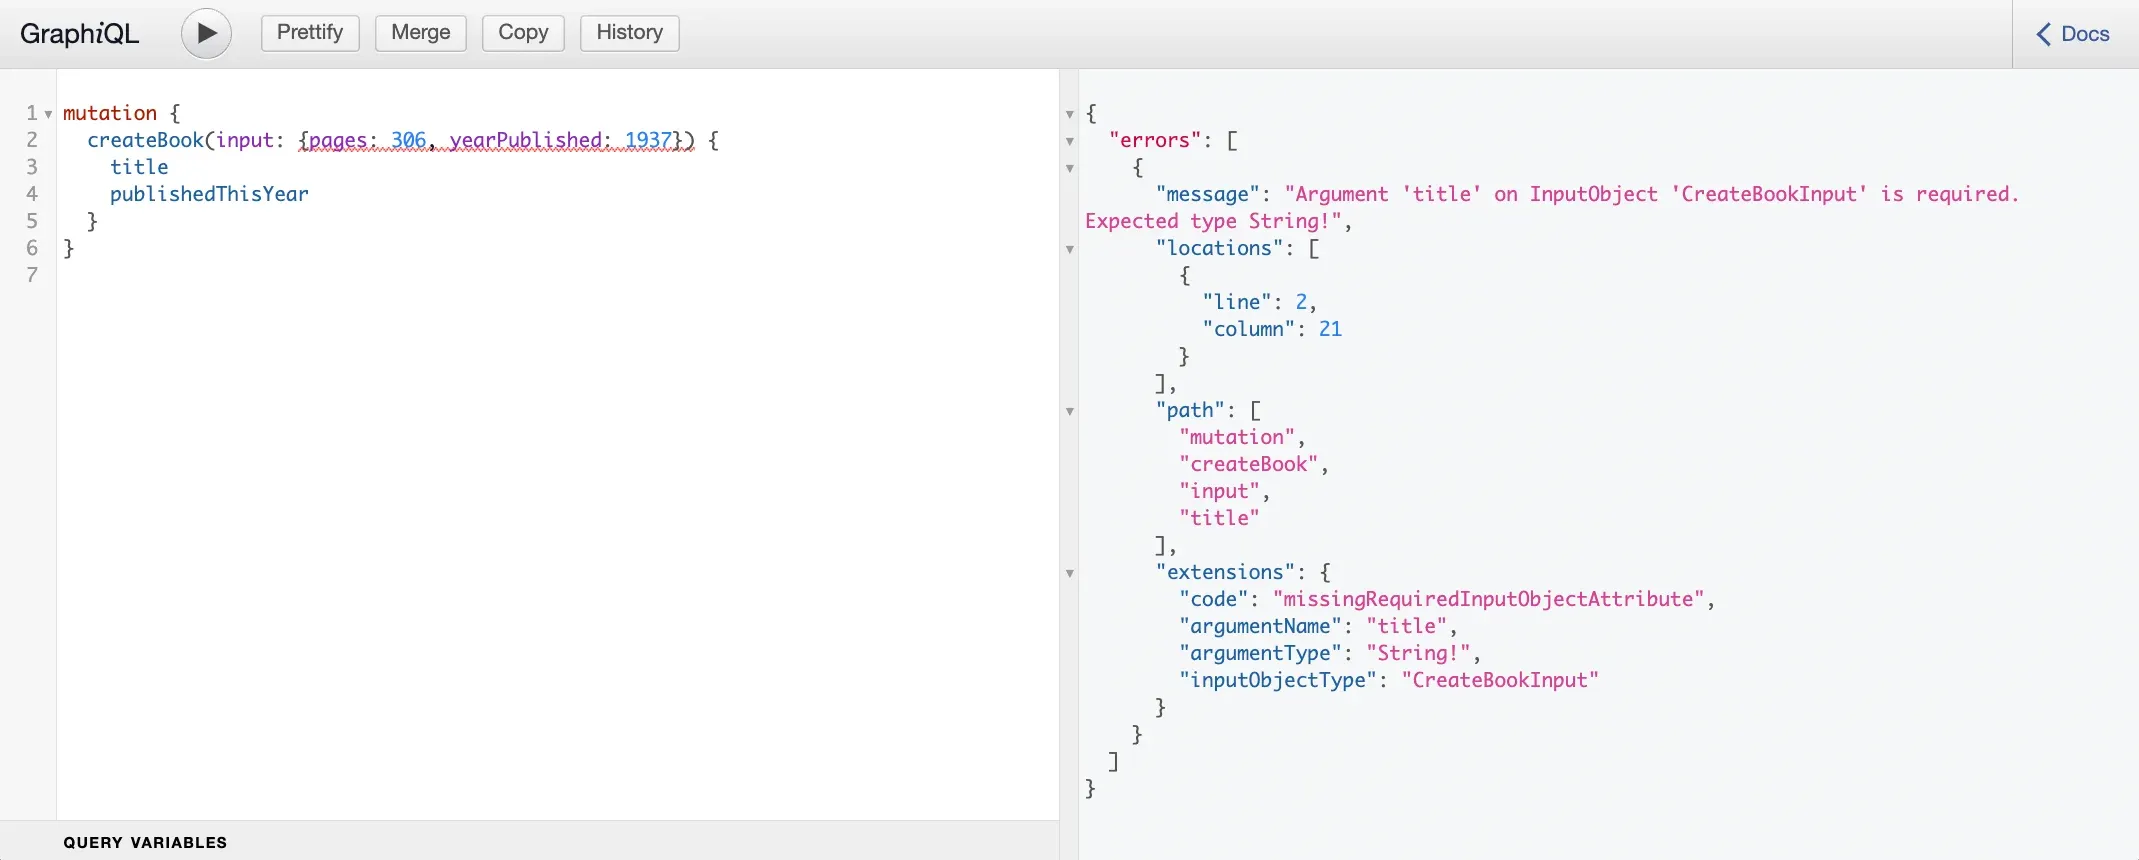
GraphQL errors are readable and tell you the exact location of what caused the error. So, for example, if no title argument were to be given, GraphQL would return something like this:
{
"errors": [
{
"message": "Argument 'title' on InputObject 'CreateBookInput' is required. Expected type String!",
"locations": [
{
"line": 2,
"column": 21
}
],
"path": [
"mutation",
"createBook",
"input",
"title"
],
"extensions": {
"code": "missingRequiredInputObjectAttribute",
"argumentName": "title",
"argumentType": "String!",
"inputObjectType": "CreateBookInput"
}
}
]
}


Wrapping up
Congratulations! Using the above steps, you now have a working GraphQL API project using Ruby on Rails. This blog introduces widely used patterns and best practices while covering objects, queries, and mutations. Along with that, we have also given reasons why learning and using GraphQL is an excellent idea.
Now, this is just the beginning. We hope this blog gave you a brief overview of the core concepts of GraphQL and its implementation via Ruby on Rails.


